I have been in TURBO nesting mode lately! This past weekend, my husband and I worked on the nursery most all day. I feel so much better!
I posted a few weeks back about my little project to do my own nursery letters to spell her little name on the wall. It was really pretty easy (with hubby’s help!) and less expensive than buying custom ones in the store. Here is how we did it:
Supplies:
* 1/8 ” thick plywood cut into the size you want to display the letters (I did 10″ x 10″ squares)
* Wooden letters purchased at any kid’s store or website. I bought KidKraft 8″ white letters for $4.95 at Bergstrom’s.
* Enough fabric to cover the front of the wood square. I bought mine through Pixie Dust Decor. Enter coupon code PN20 for 20% off your entire order from now until 10/1! Or, enter PDHOSTESS for 25% your entire order from now until 7/8!
* Ribbon to hang squares. I got 10 yards of ribbon, and did the ribbon pretty long (2′ each side.)
* Staple gun or regular stapler
* Small wood screws & a drill bit (husband had to help me with this part!)
Steps:
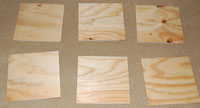
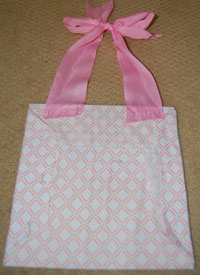
1. Cut plywood into the size squares you would like to mount the letters on.
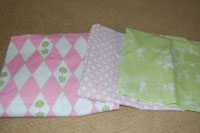
2. Cut fabric into pieces to cover the front side of the wood.
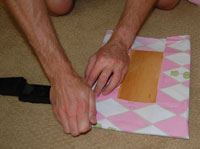
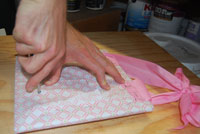
3. “Wrap” the fabric around the backside of the square, almost like wrapping a present. Staple fabric to wood with a staple gun or regular stapler. We got by with using a regular stapler, but a staple gun would likely work much better.
P.S. Those are hubby’s hairy arms, not mine!
4. Cut ribbon into the sizes you want to hang. Staple ribbon to the top of the square in the back and tie a pretty bow at the top so you can hang them.

5. Attaching the letters to the front of the fabric square (this part written by my hubby who did them for me!)
A. Use small wood screws that are long enough to go through your wood squares and adequately screw into the wood letters.
B. Center the letter on the wood square. Lift the letter and mark 2 spots on the wood square where you would like the screw to hold the letter. It is best to screw the letter in 2 spots, preferable in opposite corners.
C. Make a small (1/8″) cut in the fabric where you made the 2 marks in step B. This prevents the fabric from gathering around the drill bit. Drill small holes through the wood square.
D. Turn the wood square over and screw in your wood screws. Do not screw in all the way, but allow the screw to protrude slightly through the fabric side of the square.
E. Again center the letter on the wood square. When it is in position push the letter down on the protruding screw tips.
F. While holding the letter on the wood square, flip the square so the letter is face down on a solid surface. Screw in the wood screws into the letter.
G. Make sure the letter is flush with the wood square and secure.
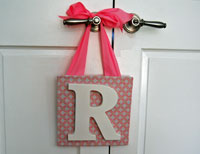
Step 7 – TA DA! You are done! I did mine in alternating fabric backgrounds. It looks SO cute on the nursery wall! I don’t want to post a picture just yet of the finished product in her room as I don’t want to reveal her name just yet! Will do so after she arrives! And no, it doesn’t start with “R!” Hee hee…
Happy Crafting!
so glad you clarified the hands!!! haha. they look adorable!! (the letters, I mean!!)
What a great idea and thanks for the step by step. I had looked at doing this a while back for each of kids rooms but I was discouraged after shopping for letters on EBAY and the ones I liked were almost 16 dollars each. This is great and the steps make it seem very doable. Thanks for sharing. Can’t wait to see the finished nursery and of course your little one.
Great idea! I can’t wait to find out the name!!!
I am impressed you little DIY’er! They look great!
Thanks for the tutorial! Using fabric is a great idea.
WOW! They turned out AWSOME! Thanks so much for sharing your idea! Thats a great idea for a baby shower gift as well, if the name is known! Can’t wait to see the finished room!
Jen, the letters mounted on the board look fantastic! Very creative!
They also have 8" or 9" wood letters at Michael’s for only $2.99. They come in white, but I painted them myself to match my room (really easy)!
Love this such a great idea! I will bookmark this so hopefully I can do some decorating in the girls’ room this summer!